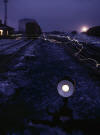
 Jack Delano, “Departure
Yard at C&NW Rail Road,” Chicago, 1942
Jack Delano, “Departure
Yard at C&NW Rail Road,” Chicago, 1942Night Photography
"Photography is the art of
balancing light and time, but night photography is about balancing patience and
caffeine".
Nighthawks Flickr Group
For successful night photography you need a digital camera that allows you to keep the shutter open for a long time, anywhere from 3 to 30 seconds. Check your camera specifications in the User's Manual under Shutter Speed. The shutter speeds available will be given as a range, e.g. 30 sec. - 1/2,000 sec.
60 Beautiful Examples Of Night Photography
http://www.smashingmagazine.com/2008/11/09/60-beautiful-examples-of-night-photography-2/
 Jack Delano, “Departure
Yard at C&NW Rail Road,” Chicago, 1942
 Richard Steinheimer,
“Southern Pacific #4194 ‘Tehachapi’ Night Train 55 at Glendale Station,”
Glendale, CA, 1950
Expose to the Right
Understanding histograms is paramount to successful digital photography, whether it be daytime or nighttime photography.
Determining optimal exposure is based on an evaluation of luminosity and RGB histograms, the preview image, the flashing highlight indicator, and analysis of the scene based on experience.
There is no such thing as an ideal or perfect histogram because it is simply a description of tones in an image.
However, a right-biased histogram—one where the bulk of the data is on the right side—is more flexible and apt to make a better quality print. Camera meters provide an exposure reading based on 18 percent reflectance, assuming that all of the tones that make up the image will average out to middle gray. Exposing for middle gray probably yields the best exposure for JPEG shooters, but RAW files benefit from additional exposure.
How much?
An optimal RAW file is given as much exposure as possible, and the histogram is pushed as far to the right as possible, without clipping important highlights. A good deal of compromise is often required to balance the need for a right-biased histogram with the need to preserve highlights.

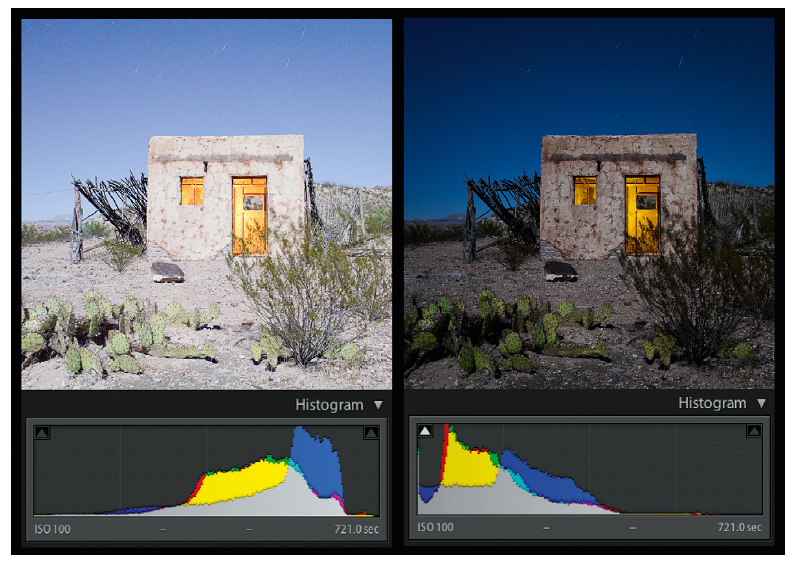
Lance Keimig, “Contrabando Movie Set,” Lajitas, Texas, 2009
This image looks severely overexposed, but the histogram shows that it has the maximum possible exposure without highlight
clipping. The exposure was reduced by a little more than 1˝ stops in development. The overexposure ensures that the shadows
are free of noise and full of detail. The frame on the left shows the image upon import into Lightroom, and the frame on the
right shows the same image after development. Canon 5D, 28 mm Nikkor PC lens, 12 minutes at f8, with three pops of an
orange-gelled flash inside the building.
Shooting Modes
For an image to be captured by a digital camera's image sensor, the latter requires exposure to light. But at night, light is what we don't have enough of.
Some of you may have noticed that, if you select a shooting mode of Auto (A) or Program Auto (P), your night pictures always come out too dark. They are simply underexposed. But, why is that -- if your camera's shutter speed ranges from, say 10 sec. to 1/2,000 sec.?
Go back to your camera's User's Manual and look a bit more carefully. Are all the shutter speeds available in Auto or P mode? Many digital cameras (we're talking consumer models here) do not make the whole shutter speed range available in A and P mode! Perhaps the slowest shutter speed available in A and P mode is only as slow as 1/3 sec. That's usually not long enough for night photography. To access the longer shutter speeds, you may need to select one of the other shooting modes, e.g. Shutter-Priority, or even switch to full Manual mode.
So ensure that your digital camera has full Manual mode and allows access to the full range of slow shutter speeds in that mode.
Self-Timer & Remote Controller
Another feature that you want your digital camera to have is a self-timer or, ideally, a remote controller. The purpose is to allow you to depress the shutter release button without introducing camera shake. I particularly like the remote controller, but not every camera comes with one or even has one available optionally.
But almost all, if not all, cameras has a self-timer. Usually the self-timer counts down from 10 sec. I find that a bit long to wait, especially since you would need to take more than one shot and it's minus 10 with the wind chill outside. The cameras that additionally provide a 2 sec. self-timer have my nod of approval here.
Tripod
A mandatory accessory that you need is a sturdy tripod. When you let the shutter stay open for a long time, the camera needs to be kept rock steady, otherwise you end up with blurred images.
All night photography starts with a tripod. Exposures of 5 to 20 seconds are common and you really need to fix your camera to obtain a sharp photo.
Don't even think about doing handheld shots of a second or longer.
Having said that, for most lightweight cameras a simple mini tripod will be more than sufficient. If necessary, you can put it on a wall or other solid object to increase the height of your viewpoint.
ISO
Let's say you used ISO 80, the lowest ISO available for best image quality. But what if at 3 sec. and F2.8 (i.e. at max. exposure possible for this particular camera), the image still came out too dark? In this case, you would need to increase the sensitivity of the image sensor to a higher ISO. Do note that increasing the ISO also increases the amount of noise visible in your images.
The biggest drawback of digital cameras is the sensor noise, pretty much comparable with the grain of conventional film.
With digital cameras the same rules apply as with conventional film: the higher the ISO number, the more noise/grain you will have in your photo. Therefore it is best to switch auto-ISO off and shoot at the lowest ISO number (check your camera manual to access the menu).
Sensor noise also gets worse at long exposures (e.g. with night photography). Most cameras have a noise reduction function for long exposures. Switch it on when the exposure time is longer than a second.
Technique
Take a number of shots at different shutter speed/aperture combinations.
Immediately review the shot as soon as you've taken it.
Ensure your LCD brightness is set to Normal, not Bright, for a truer representation of your recorded image.
A good aperture to start with is F4.0 or F5.6 (for greatest depth of field), and adjust shutter speed up or down until you're satisfied with the shot.
For good measure, take an extra shot past your optimum exposure setting. For example, if you were progressively using longer shutter speeds, and you think you've find the correct one, take an extra shot with the next longer shutter speed. Conversely, if you were using progressively faster shutter speeds, take an extra shot using the next faster shutter speed.
Night photography often takes place under artificial light. Set your camera white balance to the proper light source (e.g. tungsten or incandescent) or to the correct condition (cloudy or shade setting).
The best time to shoot is just after sunset, when there is still some color in the sky, avoiding your object being surrounded by un unappealing dark background.
The first setting to change on your camera is the flash: switch it off to avoid over exposed foregrounds. There is usually a simple button on your camera to do this.
The first thing to do is check that you can override the camera's automatic flash. Most 35mm and APS compacts have a symbol that has a lightning bolt within a circle with a 45 degree line through it - just like a no entry road sign. This turns off the flash and ensures the camera makes use of its long exposure setting. You can check to see what the long shutter speed is in your camera's instruction book. Digital cameras have a similar mode, although on models like the Nikon Coolpix 995, Sony DSC-F707 and Minolta Dimage 5 and most makes of SLR you just leave the flash in its down position and ignore the warning light telling you to activate flash.
Blackpool is famous for its illuminations and fortunately it has a pier so
you can get far enough back to shoot the illuminated tower and the sea front.
Rest on the railings and step the shutter down one stop to allow for the large
area of darkness that will fool the meter.
If the camera does have a flash off feature and you turn it off you'll find
the shutter clicks once to open and again to close when you press the shutter
button. While it's open you have to keep the camera perfectly still, which is
usually impossible if you are hand holding it. There are many supports available
to ensure the camera stays still. These range from compact to large tripods,
plus clamps and grips. You can also use a bag full of beans or tiny polystyrene
balls. These mould to the shape of the camera and provide a surprisingly solid
support, but you do need the added assistance of a wall or tree to support the
bag.
With the camera held firmly in place you can fire the shutter and make the most
of the long speed. But don't think it's always that easy. Often night
photography has huge areas of the scene in darkness with occasional illuminated
areas subjects, such as spotlit buildings, moonlit trees, fireworks, fairground
illuminations, neon signs etc. The camera's exposure meter isn't used to such
scenes and may need some manual help. It's here where the benefits of digital
become evident. You can take a picture on auto and preview the scene. If it
looks too dark, or the illuminated area is too washed out you simply manually
adjust the camera's exposure using the compensation setting and try again and
repeat until you have the right balance.
Try shooting cars from a pedestrian bridge that crosses over a motorway
bridge. Use a long shutter speed (ideally B where the shutter can be locked
open) and you'll produce graphic lines as the cars pass below you. If there's a
break in traffic hold the lens cap over the lens until another car appears. And
remove the cap just before the car enters the frame.
SLR cameras often have more scope when it comes to overrides but you have to
have the experience to set this, because you can't see what you've done until
the film is processed, and then it's often too late. The best thing to do is
make notes that you can refer to in the future.
If the camera has a spot meter you can take a reading from the illuminated area
and expose for that to avoid a really dark picture.
Use a slow shutter speed at a fairground instead of flash and your pictures
will be a wash of vivid colors. Here the static bulbs are complimented with a
whirling collision of color from the revolving ride. The low angles and creative
viewpoint has helped here. Try to aim for a speed that blurs but just enough so
you can still see detail. Here 1/8th sec was just right.
There is a range of illuminated scenes that are similar wherever they are photographed so we can give exposure values that you can use as a guide in the table below. We'll base the settings on ISO100 and you can compensate for different film speeds. The CCDs used in digital cameras are also rated at ISO100, but can sometimes also be rated up to ISO800.
| Fireworks | 1sec | f/2.8 |
| Floodlit building | 1/2sec | f/2.8 |
| Subject lit by firelight | 1/2sec | f/2.8 |
| Typical street scene with normal illumination | 1/2sec | f/2/8 |
| Shop window | 1/8sec | f/2.8 |
| Brightly lit street scene (maybe with Christmas lights) | 1/15sec | f/2.8 |
| Neon sign and brightly lit theatre districts | 1/30sec | f/2. |
Neon lights, whether Las Vegas or the local amusement arcade, provide
excellent colorful subjects. Take care not to meter off one of the bright lights
or the rest of the scene will be too dark. Also avoid metering from a dark area
or the lights will be over exposed. Try to fill the frame with an interesting
crop. A telephoto lens helps if the lights are at the top of a building or
structure.
One final thing to be aware of is color casts on color film. Most film is created to take good pictures in bright daylight so when you shoot under artificial light you will get a color cast. If the lighting is tungsten the color will be yellow, and in fluorescent light it will be green. Filters are available to screw onto the lens of an SLR camera and can be held over the front of a compact camera.
Once again digital cameras have useful ways around this. Look on the menu of a many digital cameras and there's a white balance control. This is set to auto by default and can be fooled when the lighting is a mixed, so there's an override where you can preset the type of lighting you're shooting in. Some cameras just have a series of presets - shop windows and underground lighting is usually fluorescent, while floodlit buildings, street lamps and interiors of stately homes will often be tungsten. Some of the more advanced models have a manual setting where you point the camera at a white part of the scene so it can tell what color light is reflected and compensate perfectly. You can take the shot and preview to check you're happy with the coloring. You don't have to filter the light to obtain daylight coloring, sometimes it's more effective if you include a color cast.
Church interiors will be very yellow if you don't add a filter or adjust the
digital camera's white balance. Here the shot has been deliberately left to show
the warm color against the cold blue evening light coming through the window.
Tip
When taking pictures in low light using a digital camera you are often
stretching the capabilities of the camera's CCD. This results in noise (small
irregular pixels appearing in the dark areas) Some of the newer digital cameras
have a noise reduction system that can be preset to improve the photos.
Night photography has the ability to take a scene and cast it in an unusual light-- much like the “golden hour” surrounding sunrise and sunset can add an element of mood and uniqueness to a sunlit scene. Just as how sports and landscape photography push the camera's limits for shutter speed and aperture, respectively, night photography often demands technical extremes in both (see below).
Due to lack of familiarity and since night photos are often highly technical, many photographers simply put their camera away and "call it a day" after sunset. This section aims to familiarize the photographer with obstacles they might encounter at night, and discusses how to surmount many.
Night photography is subject to the same set of constraints as daylight photography-- namely aperture, shutter speed and light sensitivity-- although these are all often pushed to their extremes. For this reason, the abundance and diversity of night photography has been closely tied to the advance of photographic technology. Early film photographers shied away from capturing night scenes because these require prohibitively long exposures to maintain adequate depth of field, or produced unacceptable amounts of image noise. Furthermore, a problem with film called “reciprocity failure” means that progressively more light has to reach the film as the exposure time increases-- leading to diminishing returns compared to shorter exposures. Finally, even if a proper exposure had been achieved, the photographer would then have to wait for the film to be developed to assess whether it had been captured to their liking-- a degree of uncertainly which is often prohibitive after one has stayed up late and spent minutes to hours exposing each photo.
Fortunately, times have changed since the early days of night photography. Modern digital cameras are no longer limited by reciprocity failure and provide instant feedback-- greatly increasing the enjoyment and lowering the risk of investing the time to take photographs at odd hours.
Even with all these advances, digital night photography is still not without its technical limitations. Photos are unavoidably limited by the trade-off between depth of field, exposure time and image noise. The diagram below illustrates all available combinations of these for a typical night photo under a full moon, with constant exposure:
Note the trade-off incurred by moving in the direction of any of the four scenarios above. Most static nightscape photos have to choose between scenarios 2, 3 and 4. Each scenario often has a technique which can minimize the trade-off; these include image averaging, stacking and multiple focal planes (to be added). Also note how even the minimum possible exposure time above is one second-- making a sturdy tripod essential for any photos at night.
The diagram does not consider additional constraints: decreased resolution due to diffraction and increased susceptibility to fixed pattern noise with longer exposures. Fixed pattern noise is the only disadvantage to progressively longer exposures in digital photography (other than also possibly being impractical), much like the trade-off of reciprocity failure in film. Furthermore, moon movement and star trails (see below) can both limit the maximum exposure time.
Just as how daylight photographers pay attention to the position and angle of the sun, night photographers should also pay careful attention to the moon. A low-laying moon can create long shadows on cross-lit objects, whereas an overhead moon creates harsher, downward shadows.
An additional variable is that the moon can have varying degrees of intensity, depending where it is during its 29.5 day cycle of waxing and waning. A full moon can be a savior for reducing the required exposure time and allowing for extended depth of field, while a moonless night greatly increases star visibility. Furthermore, the intensity of the moon can be chosen at a time which provides the ideal balance between artificial light (streetlamps) and moonlight.
Gauging exposure times during a full moon can be tricky; use f/2.0 and 30 seconds at ISO100 as a starting point (if subject is diffuse and directly lit), then adjust towards scenarios 1-4 accordingly if OK.

Another factor rarely noticed during daylight is movement of the light source (sun or moon). The long exposure time required for moonlight photography often means that the moon may have moved significantly over the course of the exposure. Moon movement softens harsh shadows, however too much movement can create seemingly flat light.
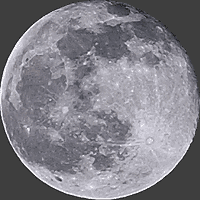
Shots which include the moon in the frame are also susceptible to moon movement. A rule of thumb is that the moon appears to move its own diameter roughly every 2 minutes. As a result, it can quickly appear elongated if this exposure time is approached.
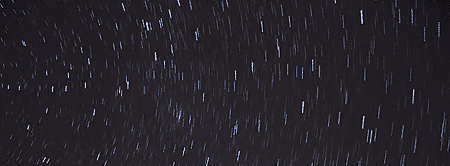
Even modestly long exposures can begin to reveal the rotation of stars in the sky. Using a longer focal length and photographing stars far from the north star increase the distance stars will move across the image. This effect can create a dizzying look, however sometimes these streaks detract from the artistic message if stillness and tranquility is the desired look.

Normal focal lengths (28-50 mm) usually have minimal star movement if exposures are no longer than about 15-30 seconds. If star trails are desired, using a large aperture and higher sensitivity (ISO 200-400) can enhance the brightness of each streak.
Proper focusing is critical at night because small apertures are often impractical-- therefore one cannot afford to waste mis-positioning the depth of field. To further complicate focusing, night scenes rarely have enough light or contrast to perform auto focus, nor enough viewfinder brightness to manually focus.
Fortunately there are several solutions to this focusing dilemma. One can try focusing on any point light sources which are at similar distance to the subject of interest. In the photo to the left, one could achieve guaranteed auto-focus by using the bright light at the bottom as the focal target.
The central focus point is more accurate/sensitive in many cameras, and so it is best to use this (instead of the outer focus points)-- even if using it requires having to recompose afterwards.
If you wish to auto-focus at infinity, just aim your camera at the moon, auto-focus, then recompose accordingly. Alternatively, bring a small flashlight since this can be set on the subject, focused on, and then removed before the exposure begins.
What is a proper exposure at night? One could "under-expose" to maintain the dark look of night, or could alternatively have the histogram fill the entire tonal range like a daytime shot. I generally recommend always fully exposing the image as if it were a daytime photo, and shooting in RAW mode. This way the exposure can always be decreased afterwards-- while still maintaining minimal image noise because more light was collected at the digital sensor.
Lens hoods are extra important with night photography – That may seem completely counter-intuitive, but when shooting at night you often have light coming from many more directions than when you shoot in sunlight, and the potential for flare increases. (You also may be a bit more likely to bump your lens into something…)