Setting up your computer to run Java
This document describes how to set up your Windows PC to run Java. It
also describes how to verify the correct installation.
Follow the instructions step-by-step, exactly in the order in which they are
given.
0. Setting up the Windows Explorer to show file extensions
First set your Window's "folder options" so that file extensions (such as
.java, .class) are displayed (because they may not be shown by default).
To show file extensions,
- Start Window's "Control Panel".
- Then "Appearance and Themes".
- Then "Folder Options".
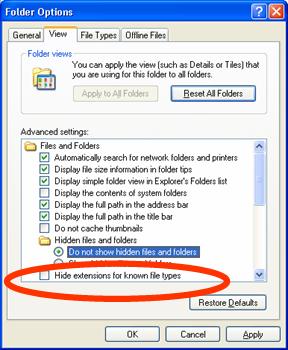
- In the pop-up window, under the "View" tab, in "Advanced Settings",
unselect "Hide extensions for known file types" if it is
selected. And click on "Apply" and "OK".
Then you will be able to see all file extensions when you browse your
computer.
1. Installing Java
- From the
Java
SE Downloads site, select the latest Java SE Development Kit
(JDK).
- Then from the
downloads page, accept the agreement and select one from your
platform (e.g. Windows 64 bit).
2. Setting paths to Java
After installing Java, some computers don't recognize it -- the full version
of Java. In which case, you need manually to "set the path to java"
so that the system knows where to find Java.
After installing Java, it would probably be placed under a folder "C:\Program
Files\Java\jdk1.x.0_yy" where x is the JDK version and yy is the Update number.
You should first confirm the folder. To do so, one way is through
Window's Explorer. You can open a Window's Explorer window by first
clicking on the windows "Start" button, select "All Programs" and "Accessories",
then "Window's explorer". Then navigate to the "Program Files" folder and
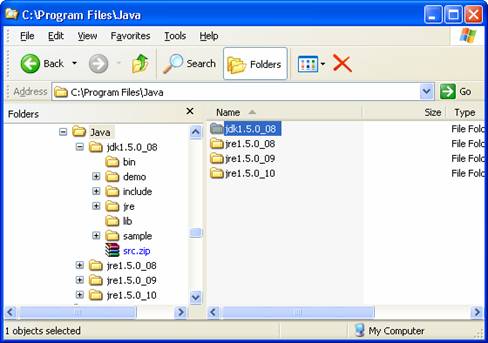
expand it. Do the same under the "Java" subfolder. Then you'll see
the subfolder named "jdk1.x.0_yy" (NOT jre...). Below is the
screenshot of my computer, where the JDK version is 5 and the Update number is 08.
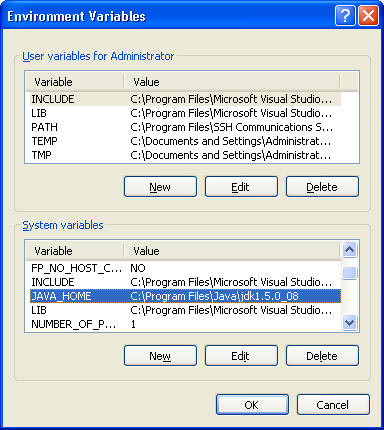
Now you set the path to this folder for your system, through Window's
Control Panel.
I recommend doing ALL FOUR described below. At least you have to do the
first two.
- Set the PATH user variable.
Click on the windows "Start" button and select "Control Panel" on the right
column. Then select "Performance and Maintenance", and "System". In
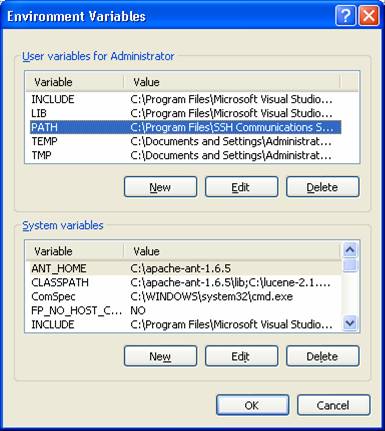
the pop-up window, select the "Advanced" tab, and click on "Environment
Variables" button.
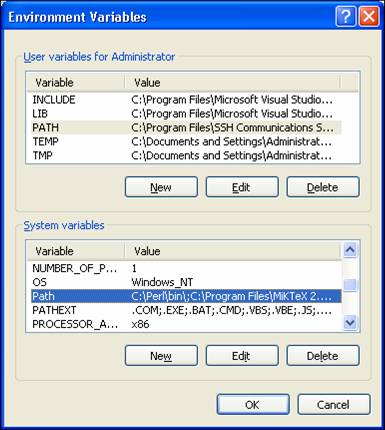
In the "User variables for Administrator", click on the line with
PATH.
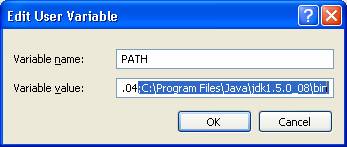
Then hit the "Edit" button. In the small pop-up window, put the cursor
at the end of the line, and type in "; C:\Program Files\Java\jdk1.x.0_yy\bin"
(with NO " "). Be sure to start with a semi-colon (;) and put your Java
path. Hit OK.
- Set three system variables.
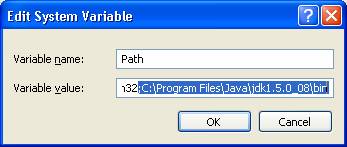
- Set the Path variable.
- In the "System variables", click on "Path".
- Then hit the "Edit" button, putting the cursor at the end of the
line in the pop-up window, and type in "; C:\Program Files\Java\jdk1.x.0_yy\bin"
(again with NO " "). Hit OK.
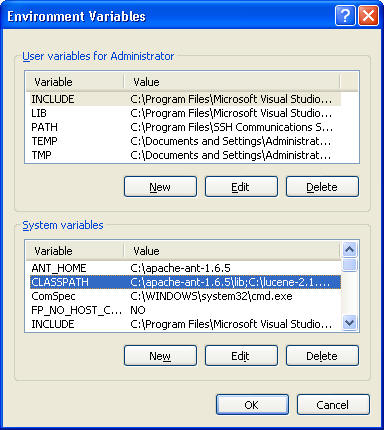
- Set the CLASSPATH variable
- Again in the "System variables", click on "CLASSPATH" and
hit "Edit". If this variable is not in the list, hit "New" (to
create one).
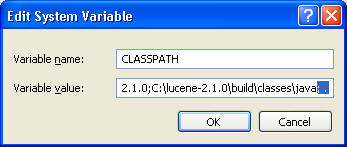
- In the pop-up window, put the cursor at the end of the line and
type in "; ." (a semi-colon
followed by a space and a dot). Hit OK.
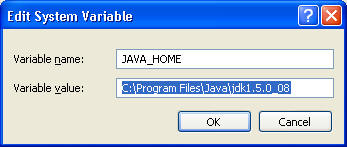
- Set the JAVA_HOME variable.
- Again in the "System variables", find "JAVA_HOME".
If this variable is not in the list, hit "New" (to create one).
- In the pop-up window, delete anything that's already there and
type in "C:\Program Files\Java\jdk1.x.0_yy" (with no
preceding ; or \bin at the end this time). Hit OK.
After you are done with all of the above,
re-start your computer.
3. Verifying installation and path setting
Here is a rudimentary verification. You do this through
Command
Prompt.
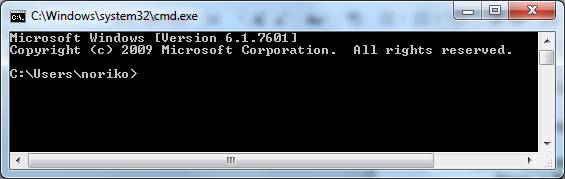
1. Start command prompt. To do so, in Windows 7, you click on Start -> Run,
and in the pop-up window, type in cmd.
On Windows 8, you expand the "Applications" and click on the icon "Command
Prompt".
An window will appear, which looks like below.
2.
Simply type in "javac" and
hit enter.
If you see a message "Usage: javac <..." (shown below)
-- then your installation is correct.
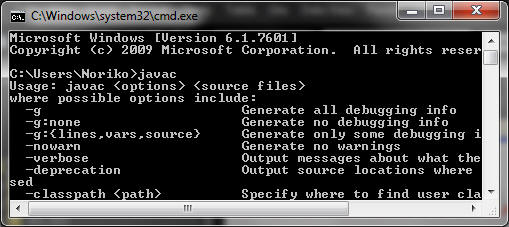
But if you get a message "javac not recognized" -- then your installation
is NOT incorrect.
Check the path settings above.
4. Installing and Setting parameters in TextPad
0. Install TextPad.
Be sure to do this AFTER Java is installed.
1. Start TextPad.
2. Under 'Configure' at the top menu, select 'Preferences'.
3. In the pop-up menu, expand 'Tools'.
4. In the sub-menu, select 'Compile Java'.
5. In 'Parameters' on the right pane, add in front of $File " -classpath
. " --> so that the whole thing in the box looks like "-classpath .
$File". Be sure to put a space before and after .
6. Click OK.
7. Do the same for 'Run Java Application' under the 'Tools' menu, that
is, 'Configure' -> 'Tools' -> "Run Java Application', and in the right pane,
make the 'Parameters' box look like "-classpath . $BaseName".